How it works.
Roll/Call replaces paper roll and clunky attendance apps with one QR code. Students scan, tap their name, done. Here's everything you need to know.
For teachers
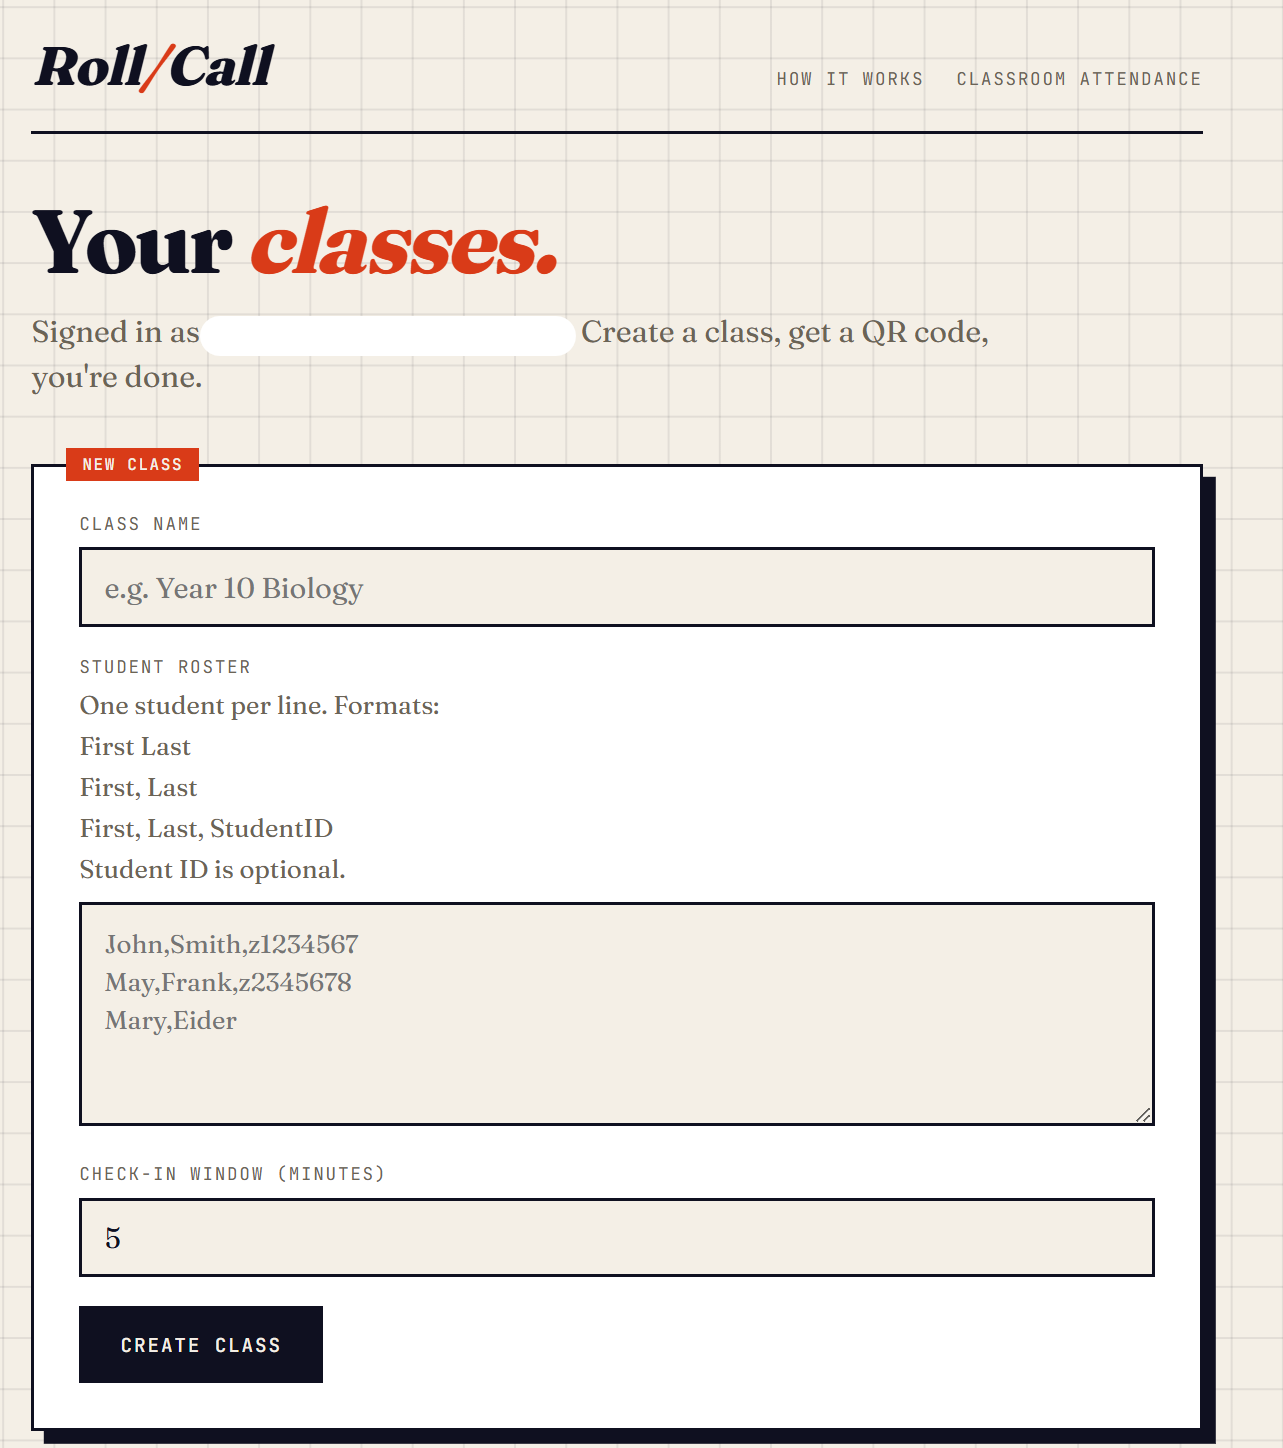
Create your class
Sign in, click New class, and paste your roster. Each line is one student: First Last, or First, Last, StudentID if you want IDs in your export. Set a check-in window duration (default 5 minutes).
Open the window & display the QR
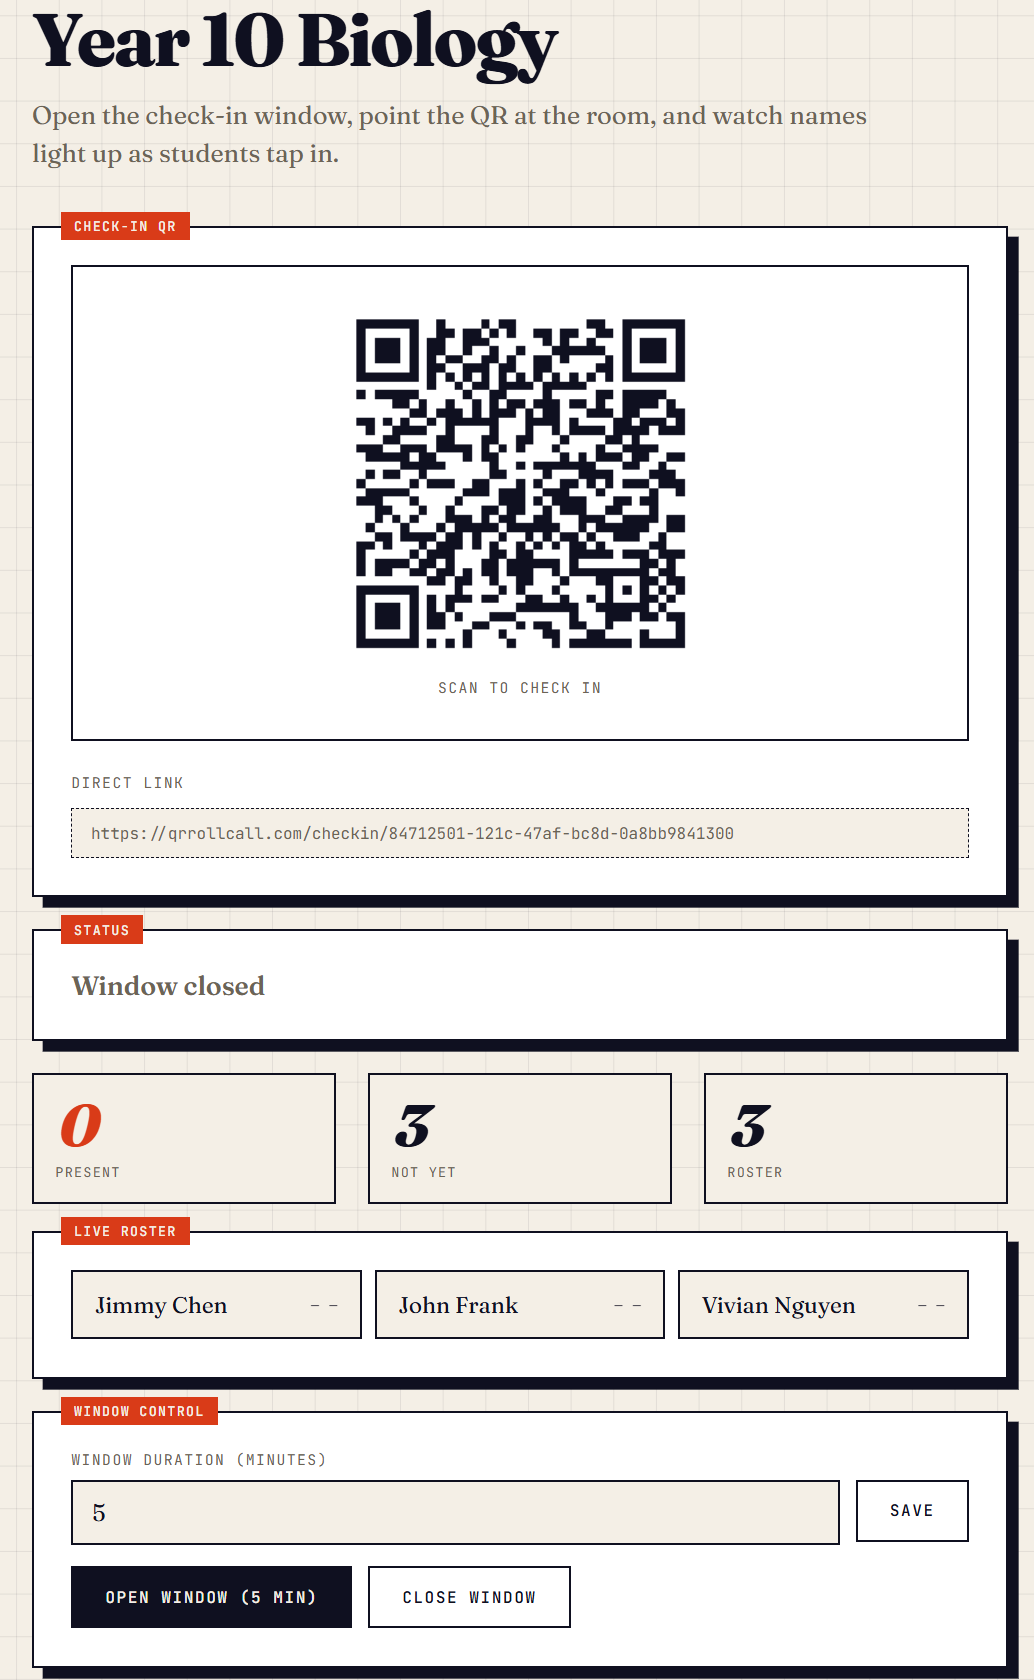
Click Open window when class starts. A countdown begins. Project the QR code on the board or hold it up on your laptop. The live roster below updates as students check in.
Students scan & tap
Students scan the QR with their phone camera, land on a page showing the whole roster, and tap their name. Names already taken are greyed out, so nobody can claim someone else's spot.
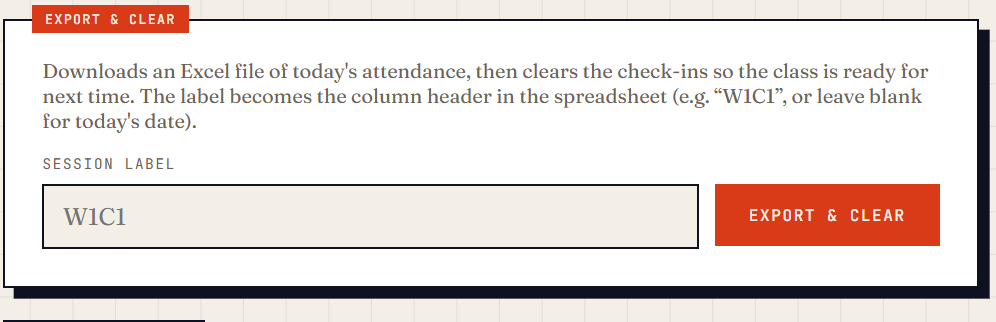
Clear the session
When class ends, type a session label (like W1C1) and click Clear. The session is saved into your attendance history and the live check-ins are wiped so the class is ready for next time. Tick Also export to Excel if you also want an .xlsx file with a 1/0 column for that session. NOTE: clearing is required after every class so the next window starts from an empty roster.
Review attendance history
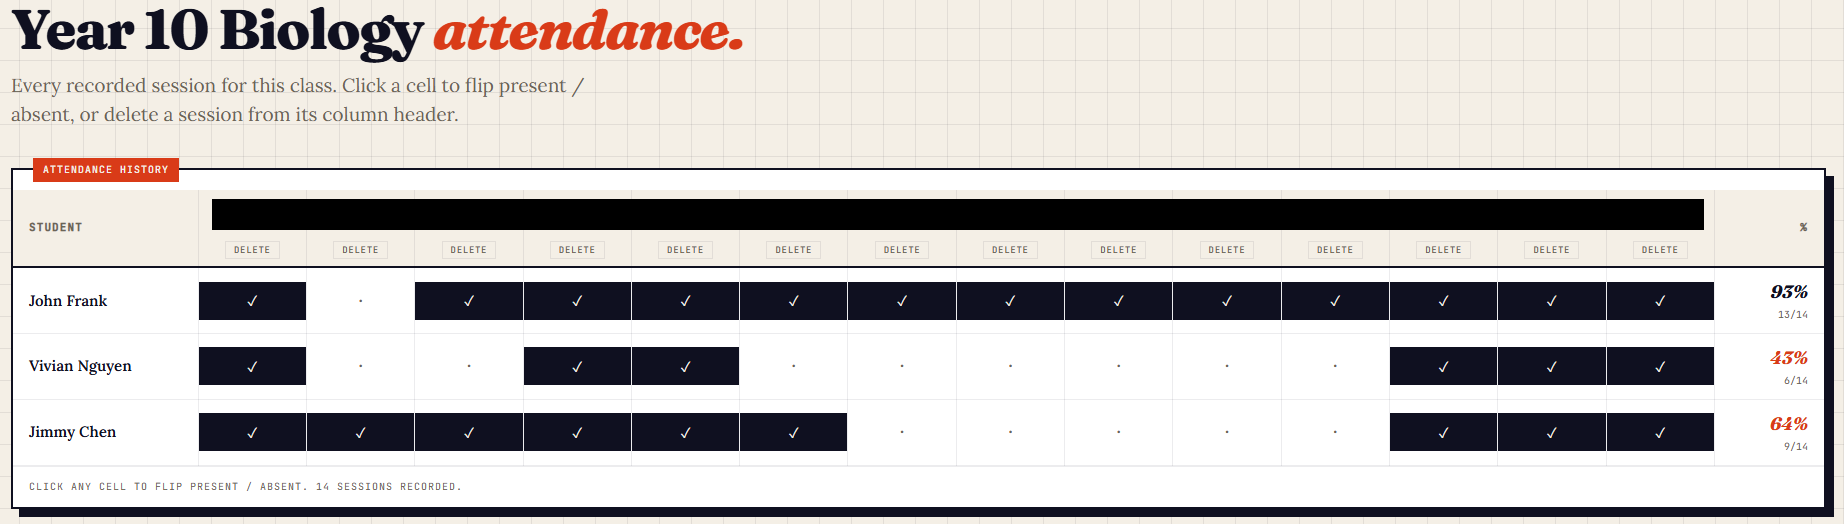
Click Classroom attendance in the top nav and pick a class to see every session you've recorded. The grid has one row per student, one column per session, and a final % column showing each student's overall attendance.
Click any cell to flip a student between present and absent for that session — handy for students whose phone died or who forgot to scan.
Delete under a session header removes that session and its attendance entirely (e.g. if you opened the window by mistake).
Edit your roster any time
On the class page, click Edit roster at the bottom. The modal lets you rename students, add new ones, or remove students from the class. Nothing changes until you click Save; hit Cancelto discard your edits. Removing a student also wipes their check-ins and attendance history.
For students
1. Scan the QR with your phone camera. 2. Tap your name from the list. 3. Done — you're marked present.
No account needed. No app to download. Takes about five seconds.
How the safeguards work
Time window. Check-in only works while the window is open. Close the window and no more names can be claimed — students who weren't there can't retroactively mark themselves present.
Session-scoped QR. Each time you open the window, a fresh single-use token is baked into the QR. A QR photographed or saved from a previous session stops working the moment a new window opens — students have to be in the room with the live QR.
One name per check-in. Each student can only be marked present once. If someone tries to claim a name that's already taken, the button is greyed out.
One device per check-in. Each phone is tagged so the same device can't check in twice under different names.
FAQ
What if a student's phone is dead? Clear the session as usual at the end of class, then open Classroom attendance, find that session's column, and click the cell next to the student to mark them present. Their percentage updates immediately.
Can I change the window duration after creating a class? Yes. On the class page, edit the number under “Window duration” and click Save. Changes apply to the next window you open.
Can I edit my roster later? Yes — on the class page, click Edit roster. Rename, add, or remove students in the modal and press Save. Removing a student also deletes their check-ins and attendance history.
Can students reuse a QR from a previous class? No. Every time you open the window, the QR is regenerated with a new token. Old photographs and screenshots stop working as soon as the next window opens.
I cleared a session by accident — can I undo it? The live check-ins are gone, but the session itself is saved in Classroom attendance. You can re-open the window and have students check in again, or open the history grid and toggle cells manually.
What file format is the export? Standard Excel (.xlsx). Opens in Excel, Google Sheets, Numbers — anywhere.
How much does it cost? $10/month AUD. Cancel any time from the dashboard under Manage billing.
Contact & support
Questions, bug reports, feature requests — email qrrollcall.admin@gmail.com and we'll get back to you.